With the huge popularity of Arduino in the past few years, everything that can be advertised “Arduino-compatible” is being commoditized to such a huge degree that it can be hard to find price-competitive components that do not have that distinctive Arduino pin layout.
An example is this TFT touchscreen LCD. It’s like, 6 bucks, which is insane. This is definitely going to show up in some future projects of mine.
Having everything work as an Arduino shield is all well and great, but I’m generally against using them. My problem with that whole ecosystem has always been that:
A) It shields(get it?) you from what is really happening on the microcontroller
B) It follows that if the user is unfamiliar with the inner workings of their system, then they will be motivated to leave the entire Arduino in place in their project
Historically, that second point has meant that people will build a project and run it permanently using what amounts to a single $30 microcontroller.
With the above commoditization argument, this point is fast losing ground when you can now buy a Chinese Arduino clone for $3.
Those arguments don’t even make sense anymore! I guess what it boils down to now is that Arduino offends my inner perfectionist.
Microchip PICs are fantastic because they are easy to use, powerful, and extremely inexpensive.
I can find a 60 cent chip that has exactly the peripherals I need, with almost no bloat.
The problem is that I have to build it into a circuit every time, thus negating the cost benefits with a time penalty.
Anyway. I have a whole bunch of PIC18F4520 DIP packages kicking around, and some other similar ones (4431 I think?). I suspect that I will be forced to start using Arduino eventually, but at least with this method I can now do some of my simpler PIC development on-the-go with USB power.
For some reason the TSA doesn’t like it when I try and take a breadboard, wire, and wire strippers onto a plane.
So the result:
A PIC dev board in an Arduino form factor.

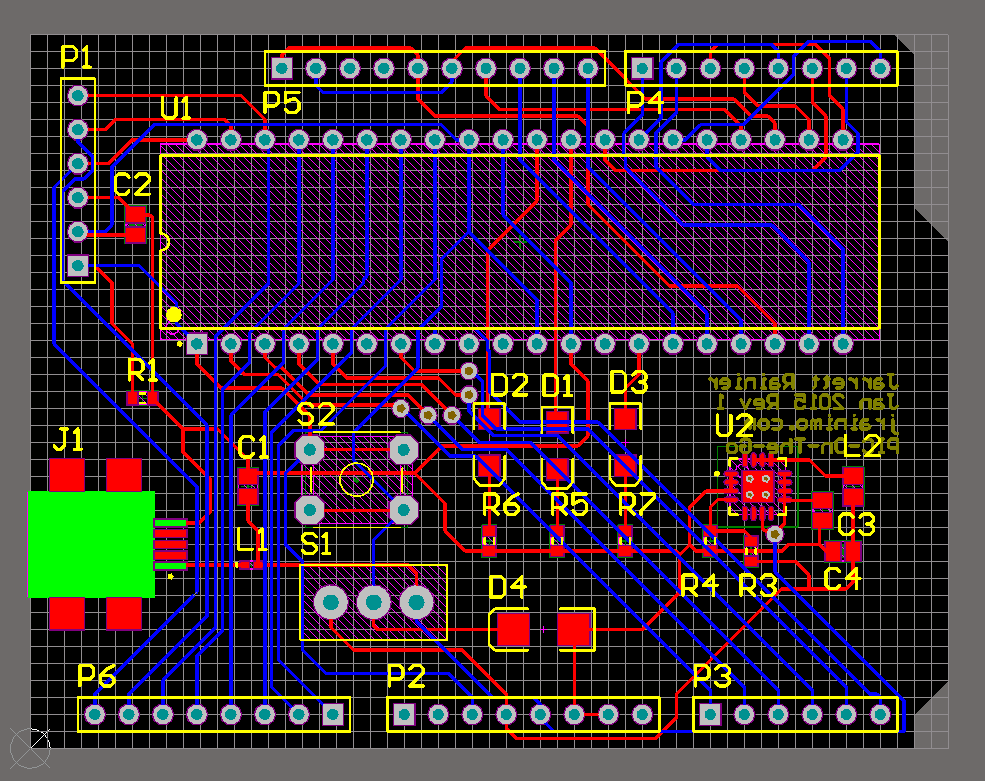
Powered by USB (no communication, though), switch-selectable 5V/3.3V power rail (don’t hit this while plugged in!), reset button, 3 LEDs, and I’ve tried to match most of the Arduino pins with the associated PIC functions (eg. SPI and analog pins are in the same location).
You still need an external programmer, but that’s okay. Programmers are pretty cheap and come in a sleek form factor. The programming header pins match the Pickit 3’s pinout, so it’s just plug-and-play with MPLAB.
When I get the board and give it a test ride, I’ll release the source files. Altium, though, so many people won’t be able to edit them.
Pingback: Hysterical | In Which Jarrett Builds