Archive for May 31, 2014

I like candy. Do you like candy?

At a place that I hang out on very rare occasions, there’s a big red button.

button1

When somebody holds it, it starts up an air raid siren that can get really loud. Unfortunately, it spins up very slowly, so people let off as soon as they figure out what the button does. That results in one tiny little blip of the siren, barely enough to bother anyone. That’s no good at all!

So for this build, I didn’t want to spend very long at it, and attempted to do everything very roughly and as quickly as possible. I found all of the appropriate components kicking around, and designed around those.

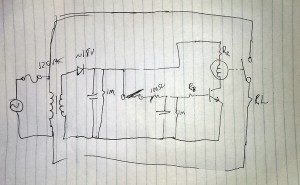
Here’s what I came up with:

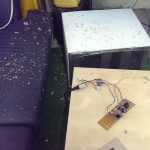
button2

I found a transformer with outputs that measure at about 12VAC. 10:1 winding ratio, I guess. After rectification and smoothing, it’s a little over 18VDC. On the right side, I used an ALA2F12, a 12V relay. The transistor is a 2N3904, just a very generic NPN BJT because this application doesn’t require anything special.

The original button was just the AC line voltage to the fuse, then through the switch to the load, very very basic.

Okay. Starting from the left:

  • Transformer outputs at 12 volts or so,
  • through the half-wave rectifier diode (1N4007 I think) – results in 12 * root 2, about 18V,
  • big filtering capacitor (200v, 820uF),
  • 1MΩ bleeder resistor so the system doesn’t hold charge indefinitely,
  • original switch (connected to the big red button),
  • 100Ω resistor(to prevent sparks)
  • into timing cap (160v, 220uF) – charges to full very quickly,
  • another bleeder resistor,
  • Rb controlling current going into the transistor’s base (more on this later),
  • BJT  base.
  • At the top: resistor controlling going into the relay coil,
  • relay coil,
  • BJT collector going to ground.

Because I’m abusing a 12V relay by driving it with 18V, I had to compensate for that a little. According to the data sheet, the coil is nominally 272Ω, taking 43mA of current. Ignoring the transistor’s collector-emitter voltage (probably ~0.2V): 18v / 43mA – 272Ω = 146Ω. So I tossed a 150Ω resistor in series with the coil, and it seems to work.

For the base of the transistor, this resistor (along with the capacitor) is what controls the active time of the system. It also controls the maximum current that can conduct through the collector-emitter junction of the 3604 Typically the gain of those are in the 70-100 range, so current going into the base should be Ib = 43mA/100 = 0.43mA. Base-emitter junction is around 0.7v, so the base resistor can be figured out by 18v – 0.7v / Ib when the base cap is fully charged. Overdrive Ib to 1mA to ensure max-on, so I used 18kΩ.

I tested everything to check timing issues, overheating, etc., and it works well. The relay gets latched for about 7 seconds, which is perfect. If I cared about being more precise with that, or wanted to change the timing values, it’s pretty simple to treat that portion as an RC circuit and tweak the resistor or capacitor values.

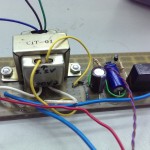
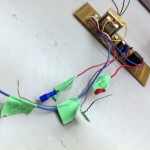
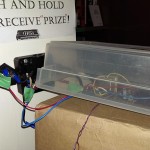
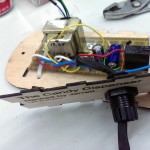
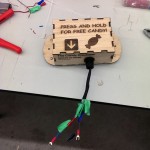
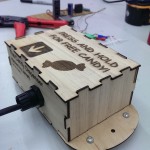
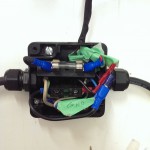
So I built it

Perfect! Start to finish, took about seven hours. Not including the abortive first attempt last week.

So before, when newcomers pressed the button, there was only a very short blip of the air raid siren. Now, the thing latched for a good seven seconds. And it gets very loud in that time.

I need another dev kit

Recently, I got given an FPGA development kit to continue working on my SHA1 system. The end-goal is to eventually integrate that into a PCI-E card, but we’ll see how that works out.


The FPGA kit I have is the Digilent Basys2, and it uses a Xilinx Spartan 3E chip. The lowest-tier, 100k gate model.


I’ve updated the current code, here, consisting of the parallel behavioral SHA1 implementation, a serial input wrapper that parallelizes the data and acts as an interface, a simulation testbench, and a physical testbench specific to my board. Unfortunately, this code, which is the absolute simplest building block of the final project is about 600% too large for my dev board. It takes up about 12,000 logical slices, and the Spartan 3E version I have only has about 2,000. For further reference, a Papillio Pro, which is very popular right now, uses a version of the Spartan 6 family that has about 9,000 slices.

My goal right now is to, without spending a whole lot of money, to get a development board, or even a bare FPGA on a breakout board with at least 15,000 slices so that I can benchmark this implementation of the algorithm. After I do that with the first iteration, I can write a concurrent version, benchmark it, and start tweaking. I’d really like to get into low-level optimization.

Stretch goals involve getting a massive FPGA to do a lot more with, but those can start to run upwards of $150 just for the chip alone.

I don’t even need to keep these boards, I just need to use them briefly as a proof-of-concept.

Stop-gap PCB creation (has stopped)

Preface:

This is a year-old post that I never published. I guess I was waiting to be able to snap some pictures, but that never happened. Most of these components have been e-wasted by now.

I’ve talked about various avenues of rapid prototyping circuit boards before, and not really come up with any definitive solutions.

My current favourite possibility is using a dye-sublimation printer, but they’re fairly difficult to get ahold of. I’m not willing to throw money at the solution just yet.

In the meantime, one of the more reliable methods is toner transfer, using a clothing iron. There are two easily-controlled variables that affect the transfer quality. There are a lot more than two, but those are the ones that involve a human element.

As a solution to that, I started work on my own laminator. I took the fuser from a laser printer and mounted it to a board.

Mounting and getting it working independently had a fairly involved process. First I needed to drive the motor.

It required a lot of torque and I have no access to any simple motor that can handle that. The only thing I have that comes close is one of my brushless DC motors, but man, I don’t want to use complicated driving circuitry for that. What I ended up doing is mating a simple 12v DC motor to the gearing for one of those motors. I laser cut a bracket that has mounting holes for both sides, ground down a shaft, and it seems to work. A very consistent and slow speed, and huge amounts of torque.

The next step was the heating element. I ran it off one of the 30v supplies we have kicking around, and it got to the “reasonably warm” level while drawing just over 1 amp. Fortunately (or unfortunately, depending on your perspective), a local e-cycle company was closing down and had an impromptu fire-sale. I picked up a 60v power supply that was labelled “broken” for free. Replaced a PTC (that literally crumbled away in my hands), and it was good to go again. The new supply got it to “properly hot” in a minute or less.

The next step was measuring the temperature. The fuser had a thermister output that starting at around 33kohms. As it gets hotter, the resistance drops. I measured around 19kohms when it was “slightly hot”. That’s the totally objective temperature description I’m going with here.

I used a voltage divider with a 100k potentiometer to tune it to 0xFF at room temperature. The reasoning being that I didn’t actually need to know the “proper” lamination temperature, just the relative values that apply to this system.

So I had the whole system, the drive motor, the heater element, the temperature measurement. It turns out that while my system is 0xFF at room temperature, everything melts at 0xA0. That’s not very hot at all! I think. I have no idea what that translates to in real measurements.

There is another printer kicking around that I should be able to pull the fuser out of. The rollers didn’t really feel that hot overall when they melted, so it’s possible that it was just because I wasn’t running the motor at the same time.

Fortunately, there’s no shortage of old laser printers destined for the scrapheap.